
It's still hard to believe the transformation! When we moved in, the kitchen was the room I hated the most. Every woman wants a functional and clean kitchen, and I'm no different. This kitchen was a dark cave of dirty old cabinets, pink laminate counters, dingy fluorescent lights, rubber baseboards, smelly linoleum, 30 year old appliances, and mauve sponge paint. It was a NIGHTMARE! I felt totally unsafe cooking anything in this kitchen, even after I'd disinfected everything-- twice. This picture really doesn't do justice to all the bad things I'm saying about it, but just trust me-- it was gross!! Keep in mind that the previous owner had three large dirty dogs that went potty all over the house, and I found dog hair inside all the appliances!
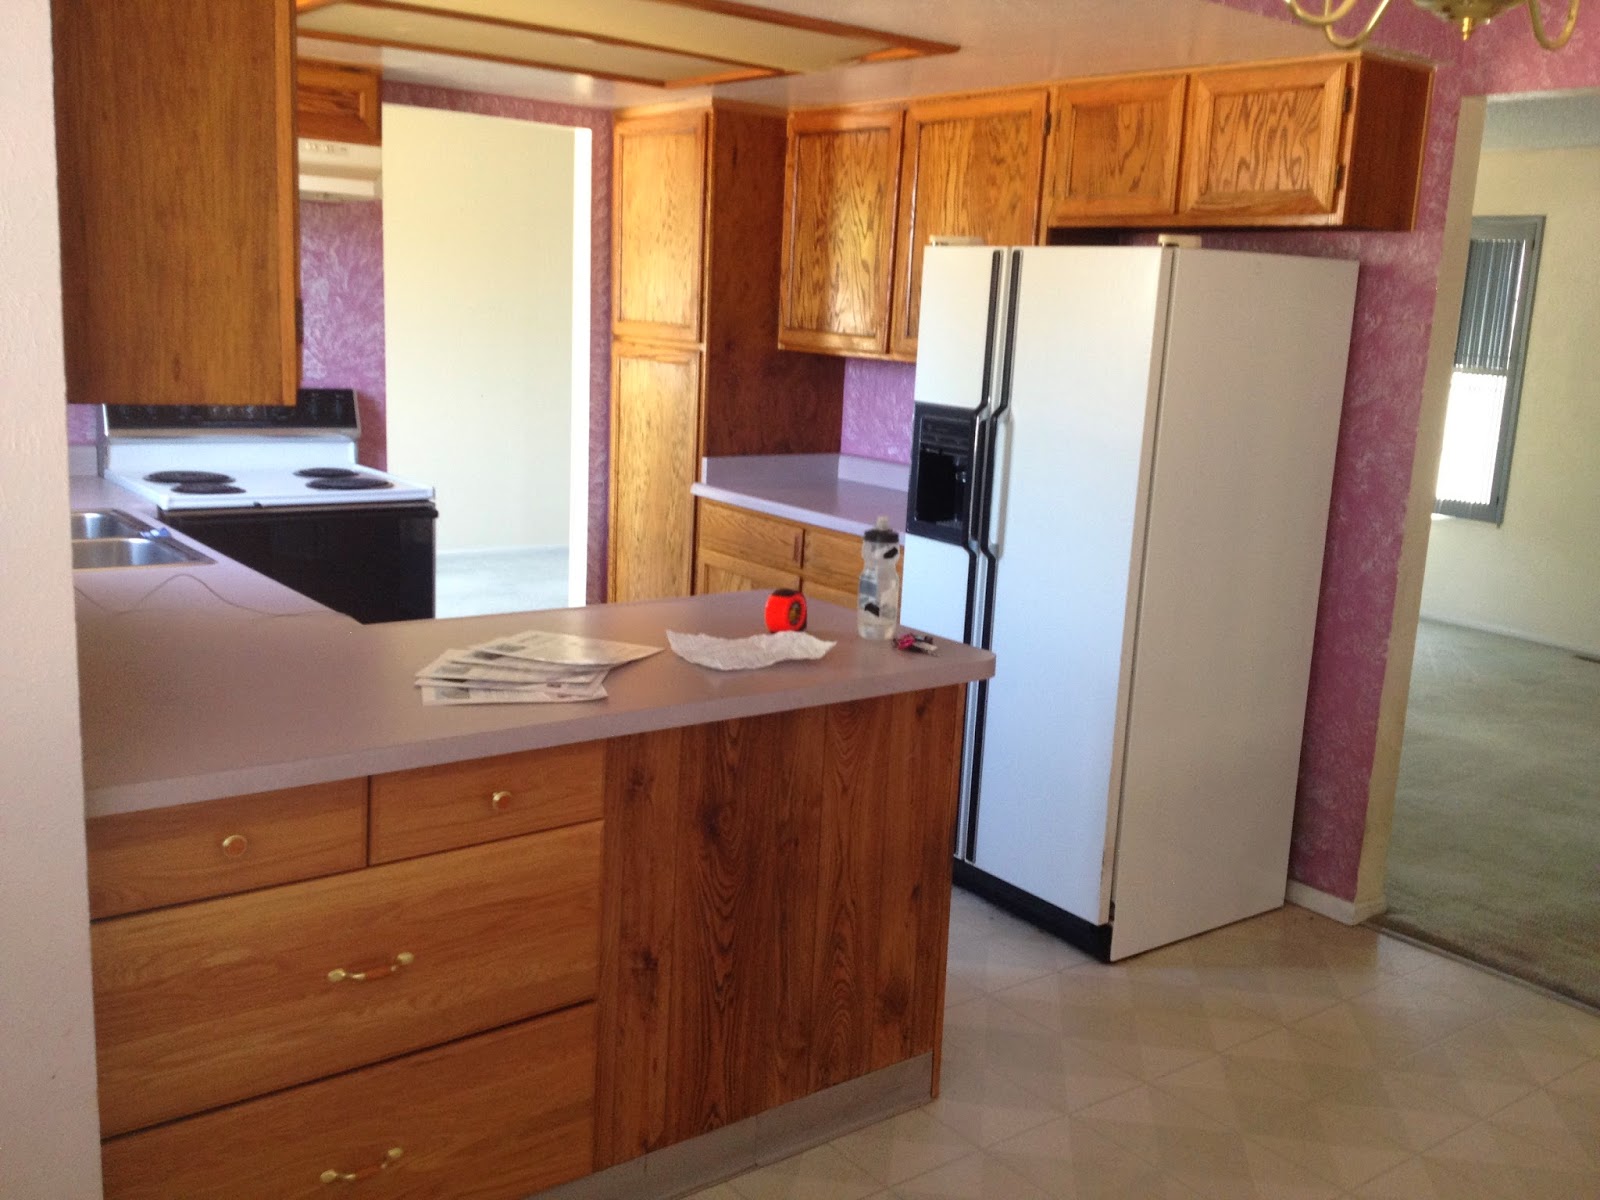
I wanted a bright, light, and open kitchen that looked custom and elegant, but I only had a couple hundred bucks to do the whole thing. The first thing we did was knock out the drop ceiling. We seriously don't even know why the ceiling was lower in the kitchen, but it was held together by 2x4s so it was easy to remove, thank goodness!! It brought our 7 foot ceiling up to an 8 foot ceiling, which is much more normal and so much more open and spacious.

I spent a lot of time on Pinterest getting ideas for kitchen colors and researching how to paint our cabinets, and this became the first major cosmetic project I tackled upon moving in. And really it was the worst time to start this project too! We moved at the end of October, and all my family was coming to town for Thanksgiving-- I basically pulled off all the cabinet doors 4 days before they arrived because I just couldn't wait to get started! Talk about a mess! To make matters worse, we had no light in our kitchen for an entire month, so we knew we needed to install something stat since we were gonna have family staying with us a whole week. It was a good deadline to strive for, but the project took much longer than we anticipated (don't they all?!?) and my sister's family basically arrived from 20 hours of driving from California to a bunch of stuff falling from the ceiling as my husband installed our recessed lighting! (You can see my cabinet doors laying on the floor in the dining room. I had also painted the walls at this point: they are Benjamin Moore Revere Pewter, but I ended up painting over them later with Hot Spring Stones, also by BM, which is a warmer color. Side rant: I'm really not sure what all the rage about Revere Pewter is-- I caved and painted the whole house in it, and then painted over it because of how cold and boring it felt!)

Thank goodness my other sister lives in town and we could spend most of our time and celebrate the holiday at her house!! After my family left, I resumed my painting project and was able to put the cabinet doors back on in time for an early December holiday party! It was so CLEAN and white!!


The kitchen was no where near the final vision I had in mind, but it was on it's way! It was weeks before we added hardware to the cabinets, and months before I painted (yes, PAINTED!!) the countertops and we installed new floors. I remember using the 6 foot by 6 foot square sample of our flooring that we had made and just putting that in the corner of the kitchen, and then covering my eyes so I could only see parts of the kitchen with the sample floor in it-- I was just so darn excited to lay those floors!! Plus it helped me visualize the final "look," and give me hope through all those months of construction!
")
And yet another few months until we got brand new stainless steel appliances (that I just HAD TO HAVE!)
")
But with every new thing we did to the kitchen, it was paradise to me! I
would dance around in it and find any excuse just to come in and look
at it and soak up the beauty of our handy work! The only thing left for us to do is install our new microwave above the stove. It's been sitting in a box for more than 6 months now and we've been too lazy to install it because we have a small one on the counter that works fine! It's one of those weekend projects that will require my husband to figure out all the electrical stuff it needs and probably take a few trips to Home Depot and ohhhh doesn't that all sound so stressful?? Let's just not do it and sleep in instead! (Oh, and I should add that I plan on building pull-out drawers in the lower cabinets for easy accessibility and organization! That's also a project for another day month!)
So here's a general breakdown of what went into our kitchen makeover:
* Painting the cabinets: about $120 (tutorial here)
* Painting the laminate counters: about $100 (check back soon for the tutorial!)
* New cabinet hardware: about $80
* New recessed lighting: about $80 for the 4 lights and cans
* New chandelier over nook table: $50 Craigslist find
* New hand-scraped laminate: $1.50 / square foot (we have about 150 square feet that was floored, so this cost about $300 plus the cost of the underlayment pad and I don't know what that cost but it was cheap)
* New 4 piece set stainless steel appliances: about $4000 (we could
have saved way more if we had bought from craigslist, but I was a
princess about this and wanted a new matching set, plus we needed a
counter depth fridge which is hard to find used)
Total:
$ 680 (without appliances)!!
Seriously we saved thousands of dollars by painting our cabinets and countertops. I honestly never want new cabinets. Counters maybe, eventually, even though ours look like granite, I will always dream of having real stone counters someday. But for now, our painted ones look and work AWESOME-- especially for only $100!!!
How about another look at that before/after photo?? I just SWOON for these comparisons!!

If you like what you see, don't miss a beat! Subscribe to my blog to receive posts directly to your email! Enter your email address in the top right part of the sidebar, and click "submit!"
Thanks for reading and
HAPPY PAINTING!!

I thought this was a tutorial on the countertops?
ReplyDeleteWhere is the counter tutorial?
ReplyDeleteA powerful share, I simply given this onto a colleague who was doing a little analysis on this. And he the truth is purchased me breakfast because I found it for him.. smile.Very well I really liked studying it! kitchen cabinets arizona
ReplyDeleteThe kitchen looks great! I'm interested in doing under cabinet lights. What kind did you use? I'm trying to decide if I want to do wired lighting or just go simple stick-on ones.
ReplyDeleteKitchen Construction in Christchurch
Terrific content! Thanks, designed for keeping this valuable each! Furthermore, this is most certainly 1 remarkable put up. Thanks, towards advantageous knowledge combined with feel that you've accordingly produced there. These days follow here best kitchen remodeling near me Thanks, a tremendous amount for those put up.
ReplyDelete